
This is the fourth article on the “Recording and Streaming your event”.
In this post, I cover details of filming the Talent.
Table of content of the series:
- Standing on the shoulders of giants
- Audio
- Screen Capture
- Filming the Talent
- Recording & Streaming Software
- Miscellaneous
- Conclusion and Suggested Kits
Filming the Talent
Whatever you may think, that’s what the speaker is called, in a cinematographic context at least.
First, let’s be clear that for technical sessions such as PowerShell conferences or User Groups, it’s probably the least important thing to focus on initially, way after the live attendees’ experience, good audio recording and decent screen capture.
But if you’ve covered the rest, then adding the picture of the person speaking makes the video much more interesting, interactive and sometimes really entertaining.
Webcam
What we’ve mostly used for the last few years are webcams on a tripod: they’re relatively cheap, easy to get, readily usable via USB, and with a wide angle which is important given the length of the USB cable. I think Tobias bought USB extenders for PSConfEU, I should definitely do the same.
Because it’s unlikely that you will have the webcam feed take the full size of your recording available for the recording, you probably won’t need to record with a 1080p camera/signal.
Usually, we do a picture-in-picture (PIP) mix of the screen capture plus the talent on the bottom right:

Picture in picture
or a side by side with some background (and a bit of overlap).

Side by Side
As you can see, if the whole picture represents a 1080p resolution, the talent window only represents a fraction of it, so the capture software will have to downscale it anyway.
If, however, you will switch to a full view of the presenter from time to time, then you’d want a camera providing a picture with the same resolution than your output (at least). You don’t want your software to try to upscale that.
Most webcams will also drop the framerate at higher resolution, especially in low light settings, like the conference rooms with a projector, or if the CPU is struggling.
For PSConfAsia we’ve used different Webcam we sourced from the organisers, and they may change over the years. We’ve had Microsoft LifeCam, Logitech 310 and Logitech C920,

C920 Pro HD Webcam
I like the C920 because it’s doing a decent job, slightly better than the others, but anything you already have might be just fine. Given the resolution you will effectively use, the main benefit you will get from a better camera is improved auto-focus, automatic exposure (it works better in low lights like a conference room with projector).
I’ve tried the “follow my face” feature at home, in a controlled environment and I think it needs to be really straight & close to your face, so I doubt it would work for a live session. Also, it drops the possible resolution and maybe frame rate.
I’ve also heard good things about the Razer Kiyo webcam, delivering 1080p at 30 fps, or 720 at 60 fps. It has a ring light built-in, but at the distance it will be from your talent, this is unlikely to have any effect.
Consumer grade Camcorder or Camera
As the room gets bigger, or the space available is awkward with a weird angle between your desk, the presenter and the screen, the shot you get from the webcam will get worse. If you need to put the camera further back or away from the recording desk, you’ll need USB extensions. The further you get, the smaller the speaker will look, because those webcams are (very) wide angle. They usually don’t have optical zoom, so when you zoom you just reduce the number of pixels available. It’s fine if the sensor is 4K (like in the Mevo), as you probably only want 1080p but if you start at 720p and need to zoom, you won’t get much pixel left, so the quality will drop severely.
That happened to me and I thought, “but I’ve got an old consumer camcorder (Sony HDR-SR10) capable of 1080p with a 10x optical zoom, why don’t I use that?”.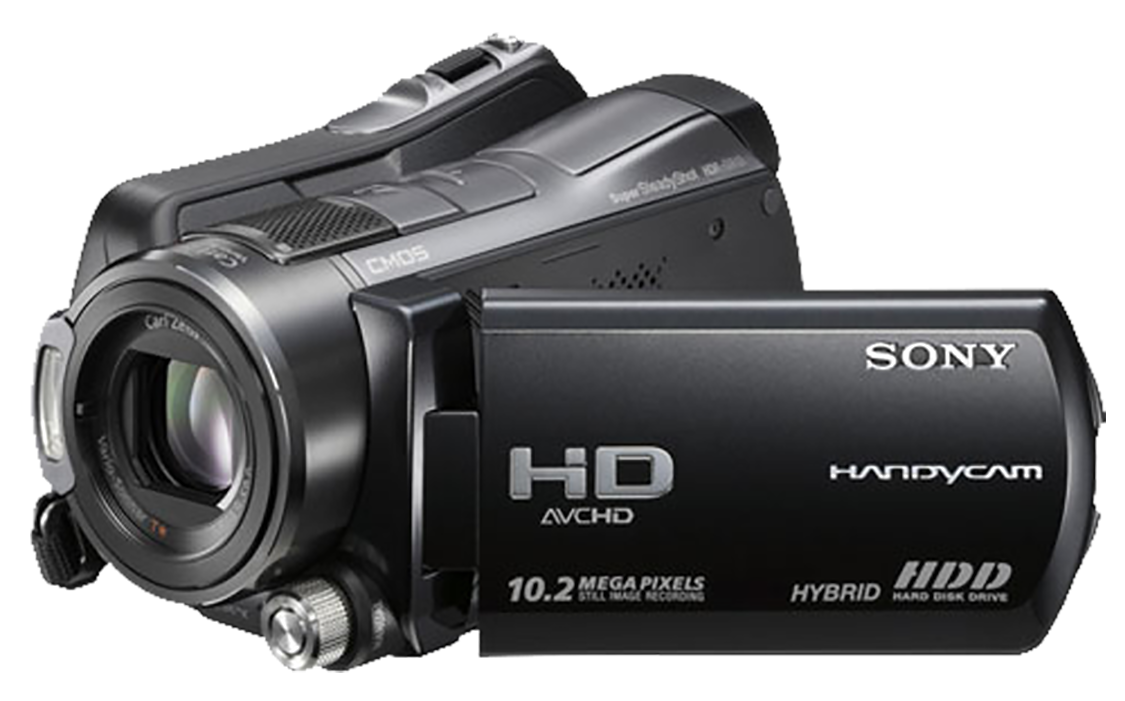
It is indeed a good way, but there’s a few caveats… The camera needs to have an output you can capture, like HDMI if you use a CamLink dongle. The HDMI must be CLEAN, that means not showing the HUD (heads-up display, or on-screen menu. It is sometimes configurable). If your camera has an SDI output, then great, but it’s more likely a prosumer model, at least, and remember to have the corresponding converter for your computer.
The camera should be able to record videos for a long time. Many DSLR cameras I’ve seen would shut down after a while because of over-heating, low battery, sleep timer and so on. Again, know your equipment and test it, because a lot is about configuration settings.
Some camcorder can loose focus when sitting still on a tripod a bit distant from the talent. Make sure someone is looking at the screen and ready to zoom/de-zoom if you can’t set the focus to manual.
Make sure you have enough battery or a power extension & power adapter. That will probably further limit where you can have your camera. Bring some tape for the cables to avoid health and safety issues.
Remember that you won’t be able to run an HDMI cable for longer than 8 or 10 meters (32 feets), unless you use repeaters of some sort.
The more difference between the output resolution and what you need, the greater impact on your computer resources using CPU cycles up or down scaling. HDMI USB interface (like the Magewell) or processor (like the Decimator) would help with that if correctly configured, but most camera should also have some settings.
Ideally, you’d have the camcorder on a tripod with a video head, and follow the talent with a relatively close shot. But that means you have someone behind the camera doing just that, on top of the person operating the recording/streaming of the mix on the computer.
All in all, it works pretty well and gives a good picture as those cameras are usually able to do a better job in the light settings of a conference venue compared to webcams, and at higher resolution. That’s how we’ve recorded the big room’s track for PSDayUK 2019.
I don’t know if I would invest in those personally, because I would need someone to operate them. I’d much prefer a NDI capable PTZ camera that works over network and that I could control remotely from my mixing software, but that’s a whole different budget (PTZ Optics 12x-ndi Broadcast starts around $2K).
The Mevo
Thanks to Microsoft UK who lent me their device on several occasions, I’ve had the chance to experiment a bit with the Mevo.
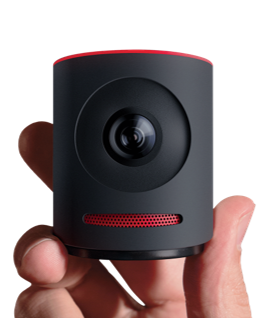 The Mevo has a very compact 4K sensor & lens, with rich software control and features. Because of the high resolution, even zooming by 50% can give you a 1080p picture.
It can do the pan, tilt, zoom, from software, by controlling the camera from a tablet or phone, via WiFi. It’s amazing when you want to quickly record the speaker and add the screen in post processing, but if you don’t want post processing you have no easy way to mix the feed of the Mevo and the screen together. Also you need to get used to the controls a bit, it’s intuitive, but you make a few mistakes at the beginning.
The Mevo is designed as an independent unit that transfer the video stream over a Wireless network (Built-in WiFi or 4G dongle), or record on a local Micro SD card. To control the Mevo you have to use an IOS or Android app (yes, only mobile devices), requiring the control device to be on the same (layer 2) network, either joining the same WiFi, or using the Mevo as an access point.
Back when I tried it, you couldn’t use the Mevo feed into your software (i.e. OBS) unless you were using the proprietary LiveStream Studio software made by the same company. Some firmware updates later allowed you to stream to any RTMP server. So if you were to spin one up and stream to it, you could then use OBS to capture from the RTMP Server. It’s a bit hacky, but shouldn’t be too hard for IT people like us. The real problem here is that public venue’s WiFi is usually protected so that two devices can’t communicate with each other directly, like they were on the same LAN.
The Mevo Boost accessory has a RJ-45 socket which would potentially make this much easier to manage (and avoid relying on a temperamental WiFi), but I did not have access to one. That said, if you want to live stream your event AND use the source from the Mevo, you now have a routing challenge. The Mevo and the Mixing Software needs to be on same LAN (Bonjour protocol), while streaming requires Internet access. You rarely (never?) have RJ45 in venues so you need to be on those restricted WiFi. Add to this the need to connect to the Mevo from the control software via WiFi, and it’s even more challenging, not plug-and-play anymore…
I tried bridging WiFi to a router I brought, but it very much depends on the configuration of the WiFi of your venue, which is unnecessary trouble (I had ~30% success doing so by either cloning my MAC address or ).
I’ve noticed recently that LiveStream Studio can register a mevo directly by setting its IP (thus removing the dependency on the Bonjour protocol), which means using routes might be an easier option by removing the need for being in the same LAN.
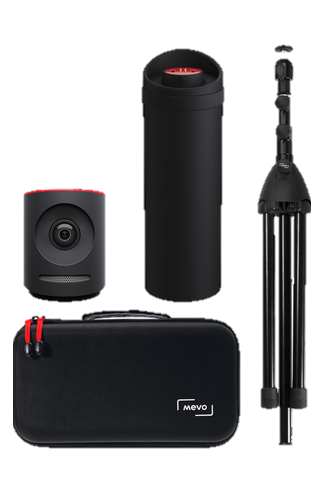 All in all, the Mevo is an original concept and some amazing ideas, but I couldn’t find a practical use for it at the time, as couldn’t mix this input with a screen capture. I’d really like to give another go, probably Mevo + Boost over cat 5 STP cable, and see if I can make it work. I think that could be amazing, but at $730 the bundle, it’s an expensive gamble.
Another thing worth noting is that the Mevo feed is significantly delayed. It’s not too much of an issue when using Livestream Studio to automatically delay and sync all sources, but can be a bit annoying, especially if you need to sync manually.
